
Georgia's Guide To Zbrush
How Not To Hate Yourself And Your Computer

TO FAMILIARIZE YOURSELF WITH ZBRUSH SPEAK
Good habits to exercise in Zbrush whether you are seasoned or a beginner are:
KEEP THINGS SEPARATED
The you from four hours later will not want to hit the current you with a shovel because you will be keeping your sculpt clean, editable, and even able to be iterated on in a concept sense if you break your workflow down into multiple subtools (zbrush's word for objects) instead of using insert spheres or insert meshes or the more flooby-nooby 'I paint what I feeeeel man' techniques you might have gotten used to before. Those are fine for art that exists solely in a digital space but we are Fabrication 2 and the whole goal of the class is taking what's in cyberspace and making it real- which ultimately makes it subject to a whole bunch of conditions like gravity, wall density, etc.
Reasons to do this include but aren't limited to:
-if you wanted to make a blind box series of a bunch of similar little characters you avoid having to smooth down / try to remove distinct features like hats or gloves if you make sure the hats and gloves exist on their own, separate from the body you are modeling them for. You could also change poses easily this way by making each arm/leg its own subtool.
- if you are printing a complicated character you would be able to divide them up into their respective pieces. This allows for the printer to print their components from their favorable angle with less support and less error, where trying to print a complicated character in one go means certain elements of their design may appear to have worse resolution than other forms, have dramatically more supports in areas that make them hard to remove, and have a higher likelihood of encountering a critical error while printing, costing you both time and filament.
- if you are prototyping a design that has to move, act, or articulate. Most of the time you only realize something isn't moving the way it needs to after you've printed it. Having things in separate parts makes it much easier to go back in and correct specific areas that need adjustment rather than having everything merged into one unworkable mass.
The Art Of Saving And Having Zbrush's AutoSave Running
Autosave is actually the beginning of a longer phrase that goes 'autosave yourself from having to write me an email at 3am during finals week because your roommate shorted your apartment's power by accidentally microwaving a foil taco bell wrapper.' I cannot count how many times autosave has saved my life, and even though people's first complaint is that it's a memory glutton it's easy to fix by going and purging the file build up after a month or so.
If you do not know how to save your file please click here.
Times To Save That Save Lives:
-Save before you dynamesh at a resolution higher than 2600
-Save before you run zremesher AT ANY LEVEL
-Save before running any in-program physics like cloth simulation
-Save before subdividing your mesh above subdivision level 3
-Save before importing a mesh from another program
-Save before committing surface noise to mesh
By consistently working with one machine you will begin to get a sense for what you can ask it to perform comfortably, and what will make the fans ramp up to jet engine level before the program grays out on you.
Sculpt For Your Medium Before Your Aesthetic
Sometimes it's important to put the cart in front of the horse when you're sculpting and designing because the parameters of the machine you'll be using will ultimately inform your design and make your life easier by preventing you from asking it to do the impossible.
FILAMENT PRINTERS: These are the printers with a large spools of materials, they are limited in capability by nozzle size alone. They have the most utility among machines and are best suited to things like life-sized props and medium to large sized characters. They are ADDITIVE, FAST, CHEAP TO PRINT WITH.
RESIN PRINTERS: Are for high high high high high detail and are most easily recognizable by their upward ascending tray that dips into a vat of resin at the bottom that is cured layer by layer with blacklight. These printers are best suited for anime figures, action figures, dnd minis, and jewelry. The ones we have at the school are a double edged sword because while they are state of the art and able to print something you'd need a microscope to see, they are also MUCH more expensive to use than the filament printers. Resin printers also have a much slower project turnaround speed because of the additional step of the isopropyl alcohol bath and having to spin around in a curing chamber for more hours. They are ADDITIVE, SLOW, HIGHLY DETAILED, EXPENSIVE TO PRINT WITH.
CNC MACHINES: These are fun and unique from the others because they make reliefs rather than objects that are fully developed on all sides. They are SUBTRACTIVE, PRINT COST DEPENDS ON MATERIAL.
To craft something for a cnc machine, you would:
-sculpt as you normally would in Zbrush
-export the alpha you'd render of it from the viewport
-Create a measured version of the wood or other material you would be using in blender or maya
-import it into zbrush
-use your alpha as a drag brush to stamp a subtractive relief on to your material, making sure not to go through it by having backface masking turned on.
- export the model for the cnc machine

Those of you with no prior Zbrush experience will think I'm just being silly when I say evil shapes exist. I'm not.
Evil shapes can be created in a number of ways:
-Importing a model from another software like Blender or Maya (these mesh are not water-tight like the meshes Zbrush generates and can be host to things like floating vertices, doubled vertices or doubled planes, intersecting planes, planes that share edges correctly but have conflicting normal map directions and cause the machine to register both sides of an otherwise one-sided object as doing something physically impossible.

The mesh to the above likely had inconsistent surface normal information which means the function can't decide what's the inside or the outside if it's able to run at all.
There are two ways to fix this:
1.) bring the inflate tool up to its largest size and set its strength to one and touch it to the object for a heartbeat. Go to the bottom of the geometry menu and run a check for nonmanifold edges. Order it to fix them regardless of what the check tells you and run the dynamesh function again.
2.) if 1 didn't work, go to the subtool menu and open the extraction menu. You will turn off double, and drag the thickness slider down to a level of near indistinguishability from the original surface and extract the mesh completely unmasked, it will comment on this and you will ignore it. The function will make the mesh water tight by Zbrush standards and you will be able to dynamesh it from there.
-If you use the smooth tool to a point a hair-thin portion of the mesh collapses in on itself like a dying star, or if you indiscriminately use the move tools on an object with an internal surface that can accidentally pass through itself. People who don't know what chaos this will raze will simply use the inflate tool to bring it back to visibility and all will seem fine and good until you try to dynamesh. This will create a rippling hole effect pictured below.

This issue is most common with the fabric simulator in Zbrush because unless collision parameters are established correctly there are good odds it will pass through itself by accident.
Three ways to fix this are:
1.) Go back before you dynamesh and turn on groups and line fill, this will make it obvious where mesh is intersecting itself and you'll be able to use the move topology brush to push them apart from one another, re-establishing the barrier between the two.
2.) Drilling it out with dynamesh. You will inflate a little, dynamesh, smooth x however many times you need to do it in order to get rid of the poc marks until you have a watertight mesh.
3.)Merge a shpere or a more appropriately shaped object and pull it around til it conforms with the surface you want. Running dynamesh will incorporate the sphere into the mesh in a way it fills the caverns this issue had created the first go round.
Another way to fast-track making an evil shape is if you use any other methods to cut holes besides boolean, dynamesh+dynamesh sub, and sculptris smooth. I don't care what slice can do or what control shift drag can do, if you try to make holes that way your computer will curse your lineage.
Have a complex shape in mind? No you dont!
Here's a quick demonstration of how much easier thinking with masks can make ambitious projects!
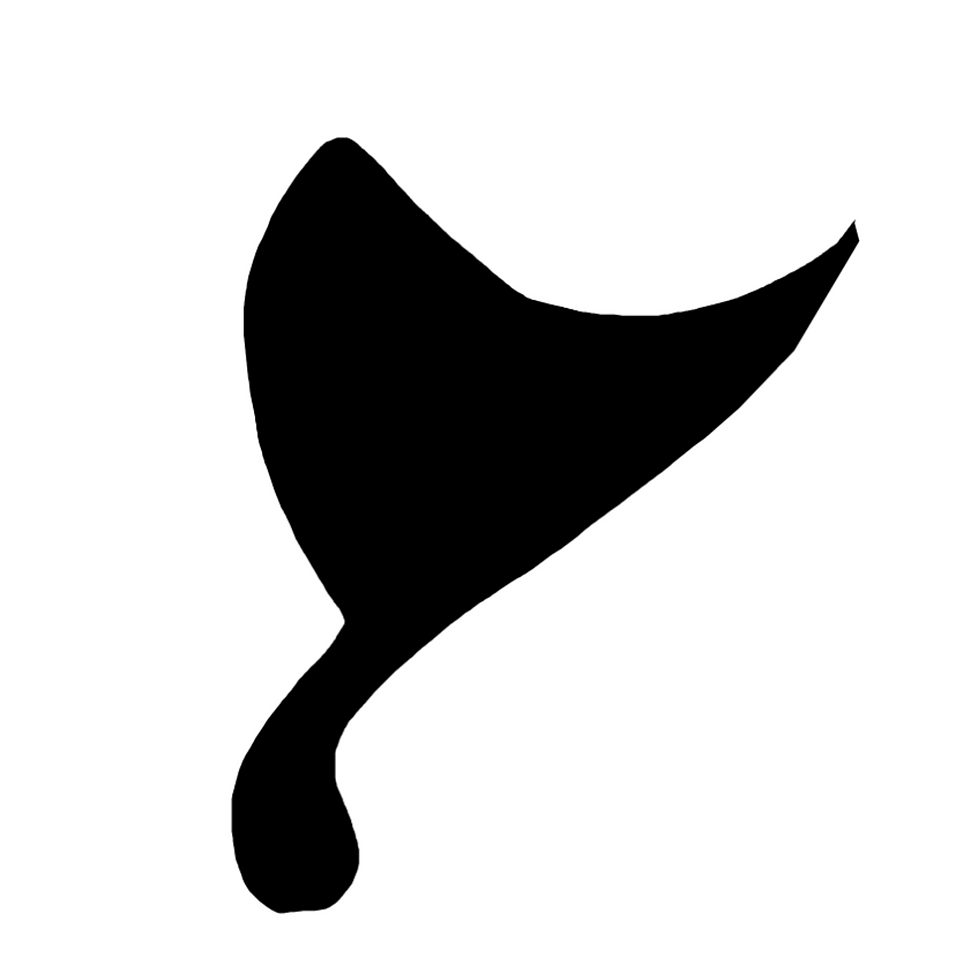

You can make shapes that would be a nightmare to sculpt by hand by drawing your own alphas! Just make sure you illustrate in grayscale and use the recognized texture resolutions like 1024x1024, 2048x2048, and 4096x4096. You can then import the images into Zbrush to use as a mask drag brush on a plane that has been subdivided high enough to capture the resolution. You might notice the yellow border around the alphas above, but it is only there to distinguish where the image ends for the sake of this tutorial, do not put borders around your alphas unless you want to on purpose.
The image below is the result of a successful mask drag, leaving a shape identical to the ones we drew in 2d. These shapes are for a butterfly mask, but because I didn't know what I wanted the interior of the wing to look like yet, I just stuck to creating the basic shapes of it. The next step is to extract the mask from the plane, which is easy to do because extraction is a masked based function. I simply turn off double, drag the thickness to my desired level and then extract the mesh.

The image below shows how I was able to position the extracted wings on the head, and pull the edges of the wings the way I wanted with the move tools. Now in position, I freehand draw the veins of the wings with the mask tool and extract them from the surface of our original object.


After that's been done it's just a matter of fine tuning them with the move tools and adding some extra flair in areas that would seem otherwise barren for a finished design, and really bring it to life with the attention to detail. Notice how almost none of this process was sculpting? Masking and extracting are incredibly powerful tools that if used to their fullest can shave hours off of your process and help you get away with making things that would be back breaking to sculpt by hand.

Welcome! I'm sure some of you have heard your fill from other students about what it's like working in Zbrush, the good, the bad, and the ugly. It's my hope that with the development of this nifty little tab system you will feel at ease regardless of if you are learning Zbrush for the first time, or if you're a veteran who has encountered a unique problem outside of regular class time.
Something to keep in mind while moving forward is: You CAN do this. Take a deep breath, if your head hurts step away and come back later, you are walking the line between art and engineering which is a tremendous feat in and of itself. You need to remember to show yourself some grace because you are learning to do something very few people can do; make something both pretty and functional at the same time. The trials and tribulations you go through bringing your design to life makes the moment it finally does that much sweeter. Creativity and persistence overcome all obstacles.
Welcome! I'm sure some of you have heard your fill from other students about what it's like working in Zbrush, the good, the bad, and the ugly. It's my hope that with the development of this nifty little tab system you will feel at ease regardless of if you are learning Zbrush for the first time, or if you're a veteran who has encountered a unique problem outside of regular class time.
Something to keep in mind while moving forward is: You CAN do this. Take a deep breath, if your head hurts step away and come back later, you are walking the line between art and engineering which is a tremendous feat in and of itself. You need to remember to show yourself some grace because you are learning to do something very few people can do; make something both pretty and functional at the same time. The trials and tribulations you go through bringing your design to life makes the moment it finally does that much sweeter. Creativity and persistence overcome all obstacles.
TO FAMILIARIZE YOURSELF WITH ZBRUSH SPEAK
Good habits to exercise in Zbrush whether you are seasoned or a beginner are:
KEEP THINGS SEPARATED
The you from four hours later will not want to hit the current you with a shovel because you will be keeping your sculpt clean, editable, and even able to be iterated on in a concept sense if you break your workflow down into multiple subtools (zbrush's word for objects) instead of using insert spheres or insert meshes or the more flooby-nooby 'I paint what I feeeeel man' techniques you might have gotten used to before. Those are fine for art that exists solely in a digital space but we are Fabrication 2 and the whole goal of the class is taking what's in cyberspace and making it real- which ultimately makes it subject to a whole bunch of conditions like gravity, wall density, etc.
Reasons to do this include but aren't limited to:
-if you wanted to make a blind box series of a bunch of similar little characters you avoid having to smooth down / try to remove distinct features like hats or gloves if you make sure the hats and gloves exist on their own, separate from the body you are modeling them for. You could also change poses easily this way by making each arm/leg its own subtool.
- if you are printing a complicated character you would be able to divide them up into their respective pieces. This allows for the printer to print their components from their favorable angle with less support and less error, where trying to print a complicated character in one go means certain elements of their design may appear to have worse resolution than other forms, have dramatically more supports in areas that make them hard to remove, and have a higher likelihood of encountering a critical error while printing, costing you both time and filament.
- if you are prototyping a design that has to move, act, or articulate. Most of the time you only realize something isn't moving the way it needs to after you've printed it. Having things in separate parts makes it much easier to go back in and correct specific areas that need adjustment rather than having everything merged into one unworkable mass.
The Art Of Saving And Having Zbrush's AutoSave Running
Autosave is actually the beginning of a longer phrase that goes 'autosave yourself from having to write me an email at 3am during finals week because your roommate shorted your apartment's power by accidentally microwaving a foil taco bell wrapper.' I cannot count how many times autosave has saved my life, and even though people's first complaint is that it's a memory glutton it's easy to fix by going and purging the file build up after a month or so.
If you do not know how to save your file please click here.
Times To Save That Save Lives:
-Save before you dynamesh at a resolution higher than 2600
-Save before you run zremesher AT ANY LEVEL
-Save before running any in-program physics like cloth simulation
-Save before subdividing your mesh above subdivision level 3
-Save before importing a mesh from another program
-Save before committing surface noise to mesh
By consistently working with one machine you will begin to get a sense for what you can ask it to perform comfortably, and what will make the fans ramp up to jet engine level before the program grays out on you.
Sculpt For Your Medium Before Your Aesthetic
Sometimes it's important to put the cart in front of the horse when you're sculpting and designing because the parameters of the machine you'll be using will ultimately inform your design and make your life easier by preventing you from asking it to do the impossible.
FILAMENT PRINTERS: These are the printers with a large spools of materials, they are limited in capability by nozzle size alone. They have the most utility among machines and are best suited to things like life-sized props and medium to large sized characters. They are ADDITIVE, FAST, CHEAP TO PRINT WITH.
RESIN PRINTERS: Are for high high high high high detail and are most easily recognizable by their upward ascending tray that dips into a vat of resin at the bottom that is cured layer by layer with blacklight. These printers are best suited for anime figures, action figures, dnd minis, and jewelry. The ones we have at the school are a double edged sword because while they are state of the art and able to print something you'd need a microscope to see, they are also MUCH more expensive to use than the filament printers. Resin printers also have a much slower project turnaround speed because of the additional step of the isopropyl alcohol bath and having to spin around in a curing chamber for more hours. They are ADDITIVE, SLOW, HIGHLY DETAILED, EXPENSIVE TO PRINT WITH.
CNC MACHINES: These are fun and unique from the others because they make reliefs rather than objects that are fully developed on all sides. They are SUBTRACTIVE, PRINT COST DEPENDS ON MATERIAL.
To craft something for a cnc machine, you would:
-sculpt as you normally would in Zbrush
-export the alpha you'd render of it from the viewport
-Create a measured version of the wood or other material you would be using in blender or maya
-import it into zbrush
-use your alpha as a drag brush to stamp a subtractive relief on to your material, making sure not to go through it by having backface masking turned on.
- export the model for the cnc machine
Those of you with no prior Zbrush experience will think I'm just being silly when I say evil shapes exist. I'm not.
Evil shapes can be created in a number of ways:
-Importing a model from another software like Blender or Maya (these mesh are not water-tight like the meshes Zbrush generates and can be host to things like floating vertices, doubled vertices or doubled planes, intersecting planes, planes that share edges correctly but have conflicting normal map directions and cause the machine to register both sides of an otherwise one-sided object as doing something physically impossible.
The mesh to the left likely had inconsistent surface normal information which means the function can't decide what's the inside or the outside if it's able to run at all.
There are two ways to fix this:
1.) bring the inflate tool up to its largest size and set its strength to one and touch it to the object for a heartbeat. Go to the bottom of the geometry menu and run a check for nonmanifold edges. Order it to fix them regardless of what the check tells you and run the dynamesh function again.
2.) if 1 didn't work, go to the subtool menu and open the extraction menu. You will turn off double, and drag the thickness slider down to a level of near indistinguishability from the original surface and extract the mesh completely unmasked, it will comment on this and you will ignore it. The function will make the mesh water tight by Zbrush standards and you will be able to dynamesh it from there.
-If you use the smooth tool to a point a hair-thin portion of the mesh collapses in on itself like a dying star, or if you indiscriminately use the move tools on an object with an internal surface that can accidentally pass through itself. People who don't know what chaos this will raze will simply use the inflate tool to bring it back to visibility and all will seem fine and good until you try to dynamesh. This will create a rippling hole effect pictured below.
Three ways to fix this are:
1.) Go back before you dynamesh and turn on groups and line fill, this will make it obvious where mesh is intersecting itself and you'll be able to use the move topology brush to push them apart from one another, re-establishing the barrier between the two.
2.) Drilling it out with dynamesh. You will inflate a little, dynamesh, smooth x however many times you need to do it in order to get rid of the poc marks until you have a watertight mesh.
3.)Merge a shpere or a more appropriately shaped object and pull it around til it conforms with the surface you want. Running dynamesh will incorporate the sphere into the mesh in a way it fills the caverns this issue had created the first go round.
This issue is most common with the fabric simulator in Zbrush because unless collision parameters are established correctly there are good odds it will pass through itself by accident.
Another way to fast-track making an evil shape is if you use any other methods to cut holes besides boolean, dynamesh+dynamesh sub, and sculptris smooth. I don't care what slice can do or what control shift drag can do, if you try to make holes that way your computer will curse your lineage.
Here's a quick demonstration of how much easier thinking with masks can make ambitious projects!
Have a complex shape in mind? No you dont!
You can make shapes that would be a nightmare to sculpt by hand by drawing your own alphas! Just make sure you illustrate in grayscale and use the recognized texture resolutions like 1024x1024, 2048x2048, and 4096x4096. You can then import the images into Zbrush to use as a mask drag brush on a plane that has been subdivided high enough to capture the resolution. You might notice the yellow border around the alphas to the left, but it is only there to distinguish where the image ends for the sake of this tutorial, do not put borders around your alphas unless you want to on purpose.
The image to the right is the result of a successful mask drag, leaving a shape identical to the ones we drew in 2d. These shapes are for a butterfly mask, but because I didn't know what I wanted the interior of the wing to look like yet, I just stuck to creating the basic shapes of it. The next step is to extract the mask from the plane, which is easy to do because extraction is a masked based function. I simply turn off double, drag the thickness to my desired level and then extract the mesh.
The image to the left shows how I was able to position the extracted wings on the head, and pull the edges of the wings the way I wanted with the move tools. Now in position, I freehand draw the veins of the wings with the mask tool and extract them from the surface of our original object.
After that's been done it's just a matter of fine tuning them with the move tools and adding some extra flair in areas that would seem otherwise barren for a finished design, and really bring it to life with the attention to detail. Notice how almost none of this process was sculpting? Masking and extracting are incredibly powerful tools that if used to their fullest can shave hours off of your process and help you get away with making things that would be back breaking to sculpt by hand.